Tag: Arts & Crafts

  • CREATE YOUR OWN WALL SUCCULENT HANGING PLANTER

    CREATE YOUR OWN WALL SUCCULENT HANGING PLANTER

    Hanging Planter
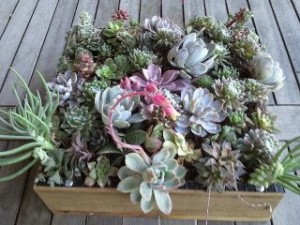
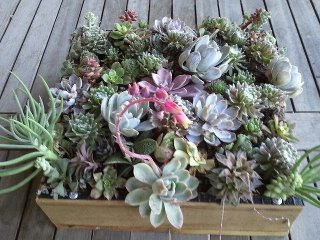
    My Wall Succulent Hanging Planter

    Here’s a project that is lots of fun. Making your own wall succulent planters will also save you money :)

    A friend’s husband made the boxes for our garden club, but directions for making a simple frame are available here:  Sunset Magazine Article.

    How to make your own succulent frame:

    1. For a 1-foot-square frame, cut four 12-inch lengths of 2×2 lumber. Nail the corners together for a frame 2 inches deep.

    2. Staple or nail a 1-foot square of plywood onto the open back of the frame. Exterior plywood or 1×12-inch redwood works well. You can also channel out a section of the back in order to hang on a wall three months later.

    3. Screw ½-inch hardware wire mesh to one side of the open frame. If desired, add trim on top of the mesh to hide it. (If you’re a skilled woodworker, you can also cut a channel into the wood and slide the mesh into the channel, hiding the mesh’s cut edges.)

    A friend and I were formatting this project for a group of 30 garden club women.

    Soak sphagnum moss overnight in a bucket. Wring out well and generously line the bottom and sides of your frame. Now fill the planter with a 50/50 mix of potting soil and cactus mix.  Make a sphagnum moss sandwich by covering the top with another generous layer of the moss.  Screw the wire mesh down on remaining two sides.

    Co-Garden Club program chair and I had previously bought succulents for all to use. We also suggested people bring succulents from their own gardens to share.

    The best succulents to use for this project are slow growing ones. Visit your local nursery for plant material if you don’t already have succulents from your own garden from which to take cuttings. Here are a few suggestions: Aeoniums, Echeverias, Crassula perforate, Senicio rowleyanus, Sedum spathulifolum. Use your imagination!

    Check out Debra Lee Baldwin, best selling author, Designing with Succulents and Succulent Container Gardens.

    The day of the event was so much fun and everyone’s box turned out differently. Since the beginning of human time women have loved working and creating together. It takes us back to our roots.

    If you intend to hang your succulent planter on a garden wall, wait three months for
    succulents to root.

    In my case, I have enjoyed my succulent boxes as center pieces on outdoor tables that are mainly in shade. I have one that I made a year and a half ago that is a little leggy but still beautiful. With a little housekeeping or should I say gardenkeeping, cutting succulents back, letting them harden off for a week and then replanting; Voila my year and a half leggy planter will look fresh and new.  :)

    Try to use slow growing succulents or ones that do not get too large. I put in what I felt was beautiful. Succulents are so forgiving that it is easy to change things around. Filling boxes tightly with succulents will give you an immediate show stopper look.  :)

    Have fun!

    Bye for now

    Rippin’ Lips

    Francesca
  • CREATING A BREATHTAKING CENTERPIECE IS EASY & FUN!

    CREATING A BREATHTAKING CENTERPIECE IS EASY & FUN!

    St. Patrick’s Day, last Saturday night, was a leprechaun reason to entertain the neighbors. I love decorating the table for a party. Sometimes, if I am really well organized I do this a day or two before the event.

    Creating an enchanting centerpiece
    is part of the ambiance for a
    successful dinner party.

    Many people don’t know where to begin. Remember finger painting in kindergarten? Painting the Centerpiece is right up there with the kindergarten experience, in my book! I get so excited, I am thrilled as I write to you about creating your own centerpieces. You too can have fun creating your own centerpieces, it’s easy!

    Growing up, my mother did not encourage me to cook with her.

    But creating an elegant centerpiece was different!

    I can remember how fun it was to go out into my mother’s garden and pick plants to bring in the house and put on the table in an interesting design surrounded by votive candles. If Pat, (Patwelsh.com -my mom) had a specific idea in mind she would pick the flowers and greenery herself, but then let me have full creative license in culminating the project. So last night, with the candle’s lit I snapped some quick photos with my smart phone, smile on my face. I was pleased and happy.

     The table has helped set mood for stimulating conversation.

                                                        I always have my dining table set with a centerpiece so all that is needed is to add the                                                                                                  finishing touches.

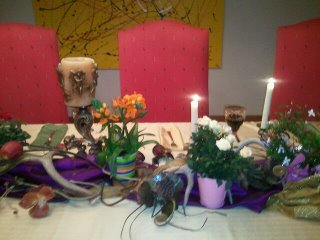
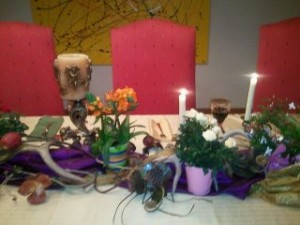
    In this case I have a gold tablecloth on the table with two runners of gauzy material, one gold and one purple. I intertwine them, then put 3 large candles of different heights on the table. Then I take 5 elk racks that have a candleholder built into each one and place them over the runner.

    Years ago my friend and I bought artistic woodland decorations from Michaels (Michaels.com). That then is the backdrop for whatever theme I chose to create.

    Many times I pick flowers and greenery from my garden to decorate the table. On this particular occasion, I went to Trader Joes (TraderJoes.com) looking for shamrocks, but they had none. No worries. They had darling small roses, bulbs in colorful pots and pink jasmine.

    Great for a St. Paddy’s Spring Display!

     The plants were so reasonable just a few dollars and, by the way, Trader Joes has daffodils this week, just 1.50 a bunch – can’t beat it!

    HAVE FUN CREATING YOUR OWN CENTERPIECES!

    Bye for now

     Rippin Lips

    Francesca